
DIY Christmas Snow Globe
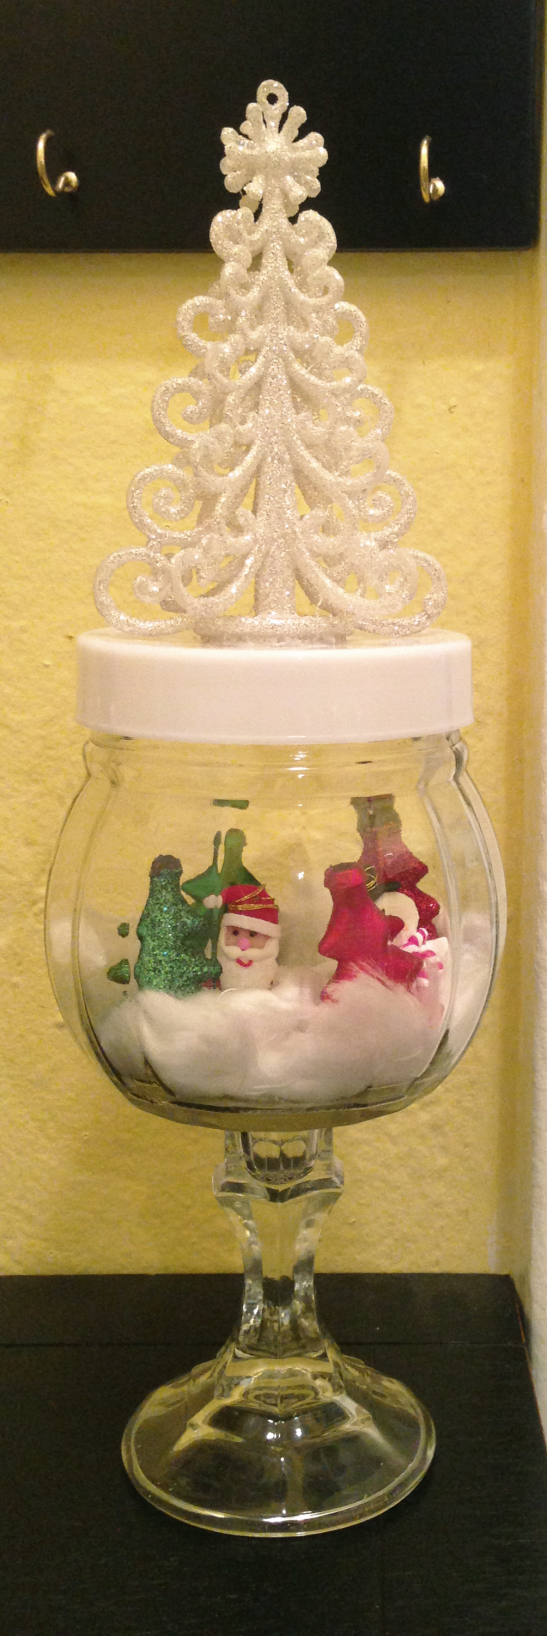
DIY christmas snow globe for $7 dollars with left overs to make a second one


Materials
Candle Stick holder(dollar tree)
Jar (dollar tree)
White Glittery Tree Ornament (dollar tree)
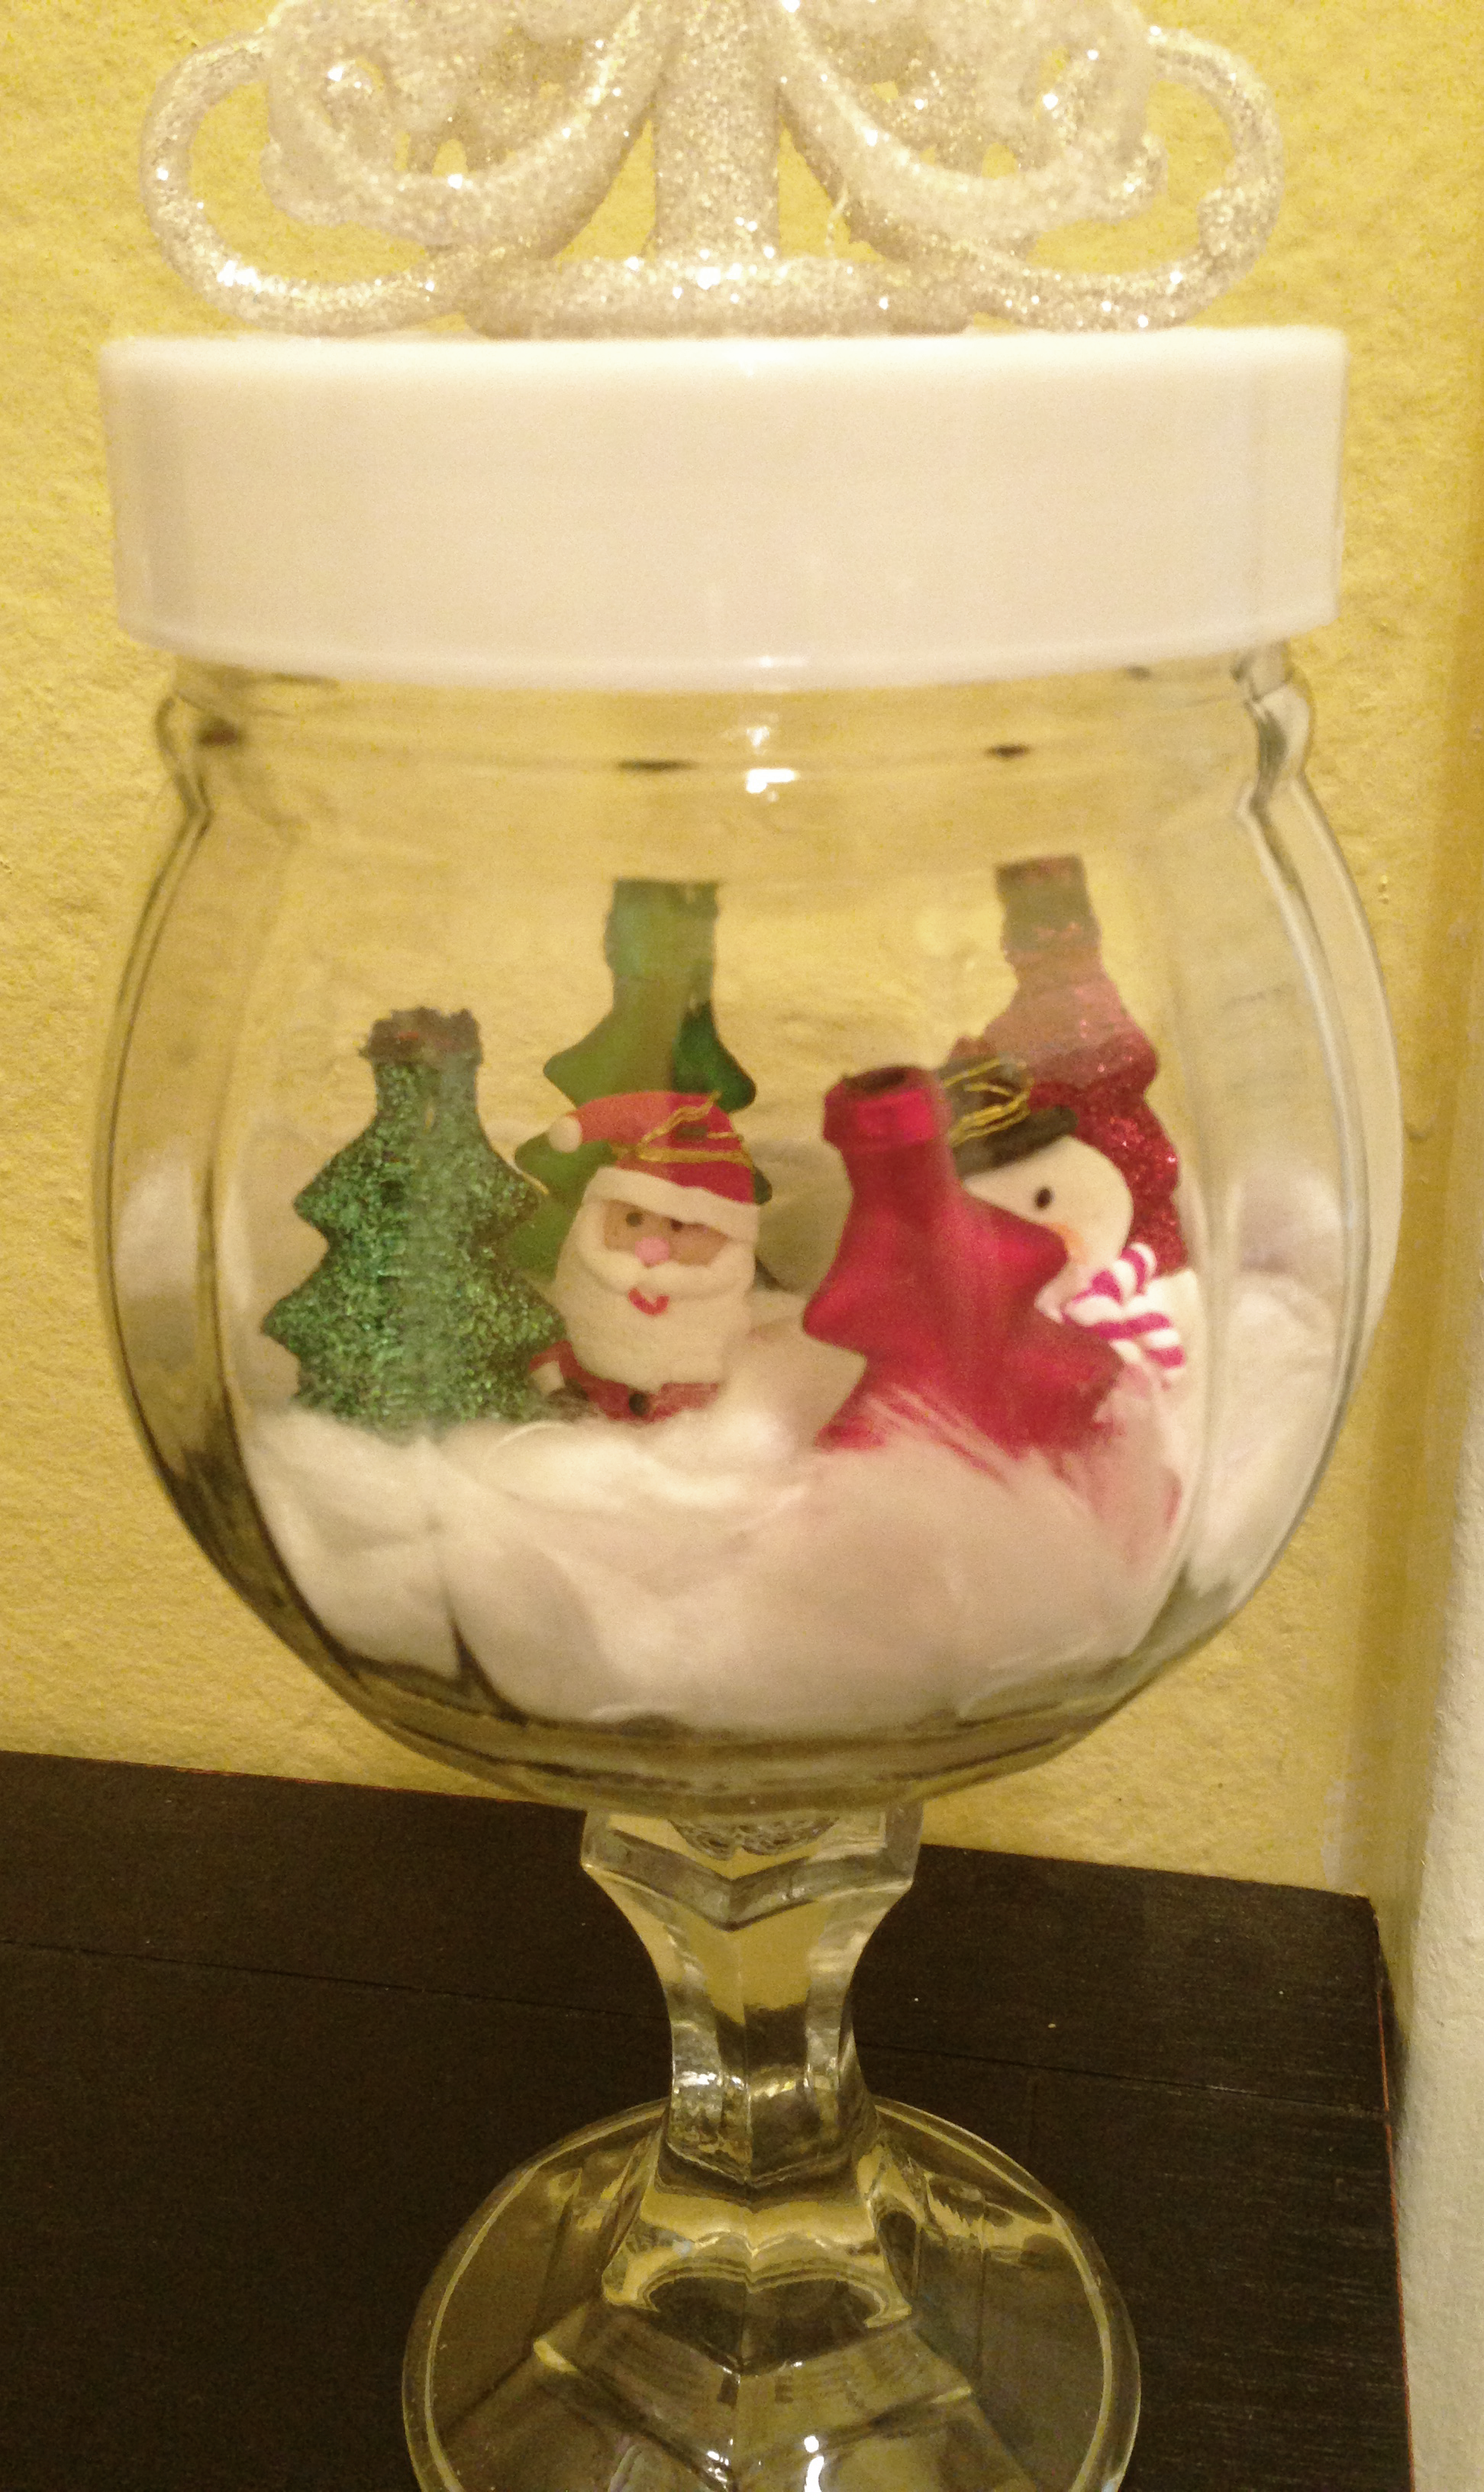
Santa Head (dollar tree)
4 Pack of Little Tree Ornaments (dollar tree)
4 Pack of Mini Character Ornaments (Michaels It was on sale plus I found a coupon making it Less Than a Dollar)
E6000 glue
Screw Gun
1) Glue the candle stick holder to the jar and let sit for 24 hours
2) Once it has dried, trace the bottom of the Christmas tree ornament on the jar’s lid.


3) Use your screw gun and a circular bit to make the hole in the lid (I had my hubby do this part)


4) Once the hole is big enough to fit the bottom part of the Christmas tree, glue it in place.

5) Rip off the Santa’s beard

6) Put some glue at the bottom of the jar and arrange his beard as snow. (The face without the beard is kind of creepy)

7) I took off the tops of the tree ornaments and wrapped the string from the character ornaments’s around their hats then glued them.


8) Now before gluing, arrange your character’s and trees in the jar to see where you would like them.
9) When you are satisfied, use hot glue to glue them down into the desired position.
10) Voila! You are done, now find a place to show it off. Happy Holiday crafting 🙂
3 comments on “DIY Christmas Snow Globe”
Leave a comment


wow so cute! love it
Pingback: DIY Christmas Snow Globe | Life through Andrea's Eyes
Pingback: mejoresideasdemoda Más de 30 ideas de decoración de Navidad DIY - mejoresideasdemoda